 As a writer, I collect so much information I often find myself dreaming of an organized library archive. I’m constantly processing nuggets for my current projects – which can include anything from body disposal in 14th century Venetian quarantines to the household traditions of Afghan families to the most popular aiming techniques in Mongolian archery – while also on a constant stream of pirates, economics, star lore, and whatever other thing I’ve recently read about.
What I’m trying to say is, there’s a lot in my head.
The reality is, I’m not going to remember it all. Especially if it is not immediately applicable to the story – heck, even to the scene – I’m currently writing.
So I’ve started creating digital archives for the information. That way, when I need it, it’s only the work of a minute or two to find.
We’re going to talk about basic information to include in your archive, and then I’ll look at three different ways to build it: Word, Google Docs, and Scrivener.
(This post contains affiliate links, which means that if you click on one of the product links and end up buying something, I’ll receive 20% of sales. Why? Because Scrivener is amazing. I’ve used it for five years and love it. And I thought, you know, since I talk about it literally all the time, maybe I should have it help pay for this blog.)
Basic Archiving Practice
Whenever you input information, make sure you include the source. This doesn’t have to be a full-out citation, but you should at least include title of work the work you’re using and page number. If you’re citing from your travel notes, include the place you were and the date. This will make it easier to find the source again if you need to look at the information surrounding the quote you selected.
For my digital archives, I use the ScanMarker. The idea is that it can highlight lines of text and translate them into typed words in a document. The marker isn’t perfect, and there are always typos that I have to fix (depending on the book’s design, sometimes more and sometimes hardly any). But I like to think it saves me some time.
Dragon Naturally Speak is also an option – or even just Google Doc’s new Voice Typing tool. These will convert you reading into text for your document.
Or you can always just type up the passages (boringgg). It really doesn’t take as long as you think it will.
Archive Method 1: Categorize Your Journals
If typing up all your notes and scanning all the things sounds overwhelming, consider at least making a digital archive to keep track of where your notes are. It can be simple as a bullet point list of topics you cover in such-and-such journal. (And make sure your journals have a table of contents!)
That way when you need to find your travel notes from Colonial Williamsburg, you know you need to look in your black leather notebook.
Archive Method 2: Word and Google Docs
Word and Google Docs are similar enough that you can do this basically the same way with either of them.
- Create a table of contents. (Instructions for Google docs, instructions for Word.)
- As you add information, include the title of the work as a header. These titles will appear in your contents so they’re easy to look over.
- On the entry, include a list of keywords under the work’s title. It will look like this:

That way, when you’re searching for a specific genre or topic, you can use the keywords to find sources quickly. If you’re the type to forget keywords, include them in a list near your table of contents.
Then you just put in your notes. Tada!
The main problem that comes with either Word or Google docs is organization. If you want to be organized (by alphabetizing titles or sorting by topics), you’ll need to decide how to do it from the start. It becomes much harder to restructure the document once you’ve gathered more than 15 or 20 pages of notes.
Archive Method 3: Scrivener
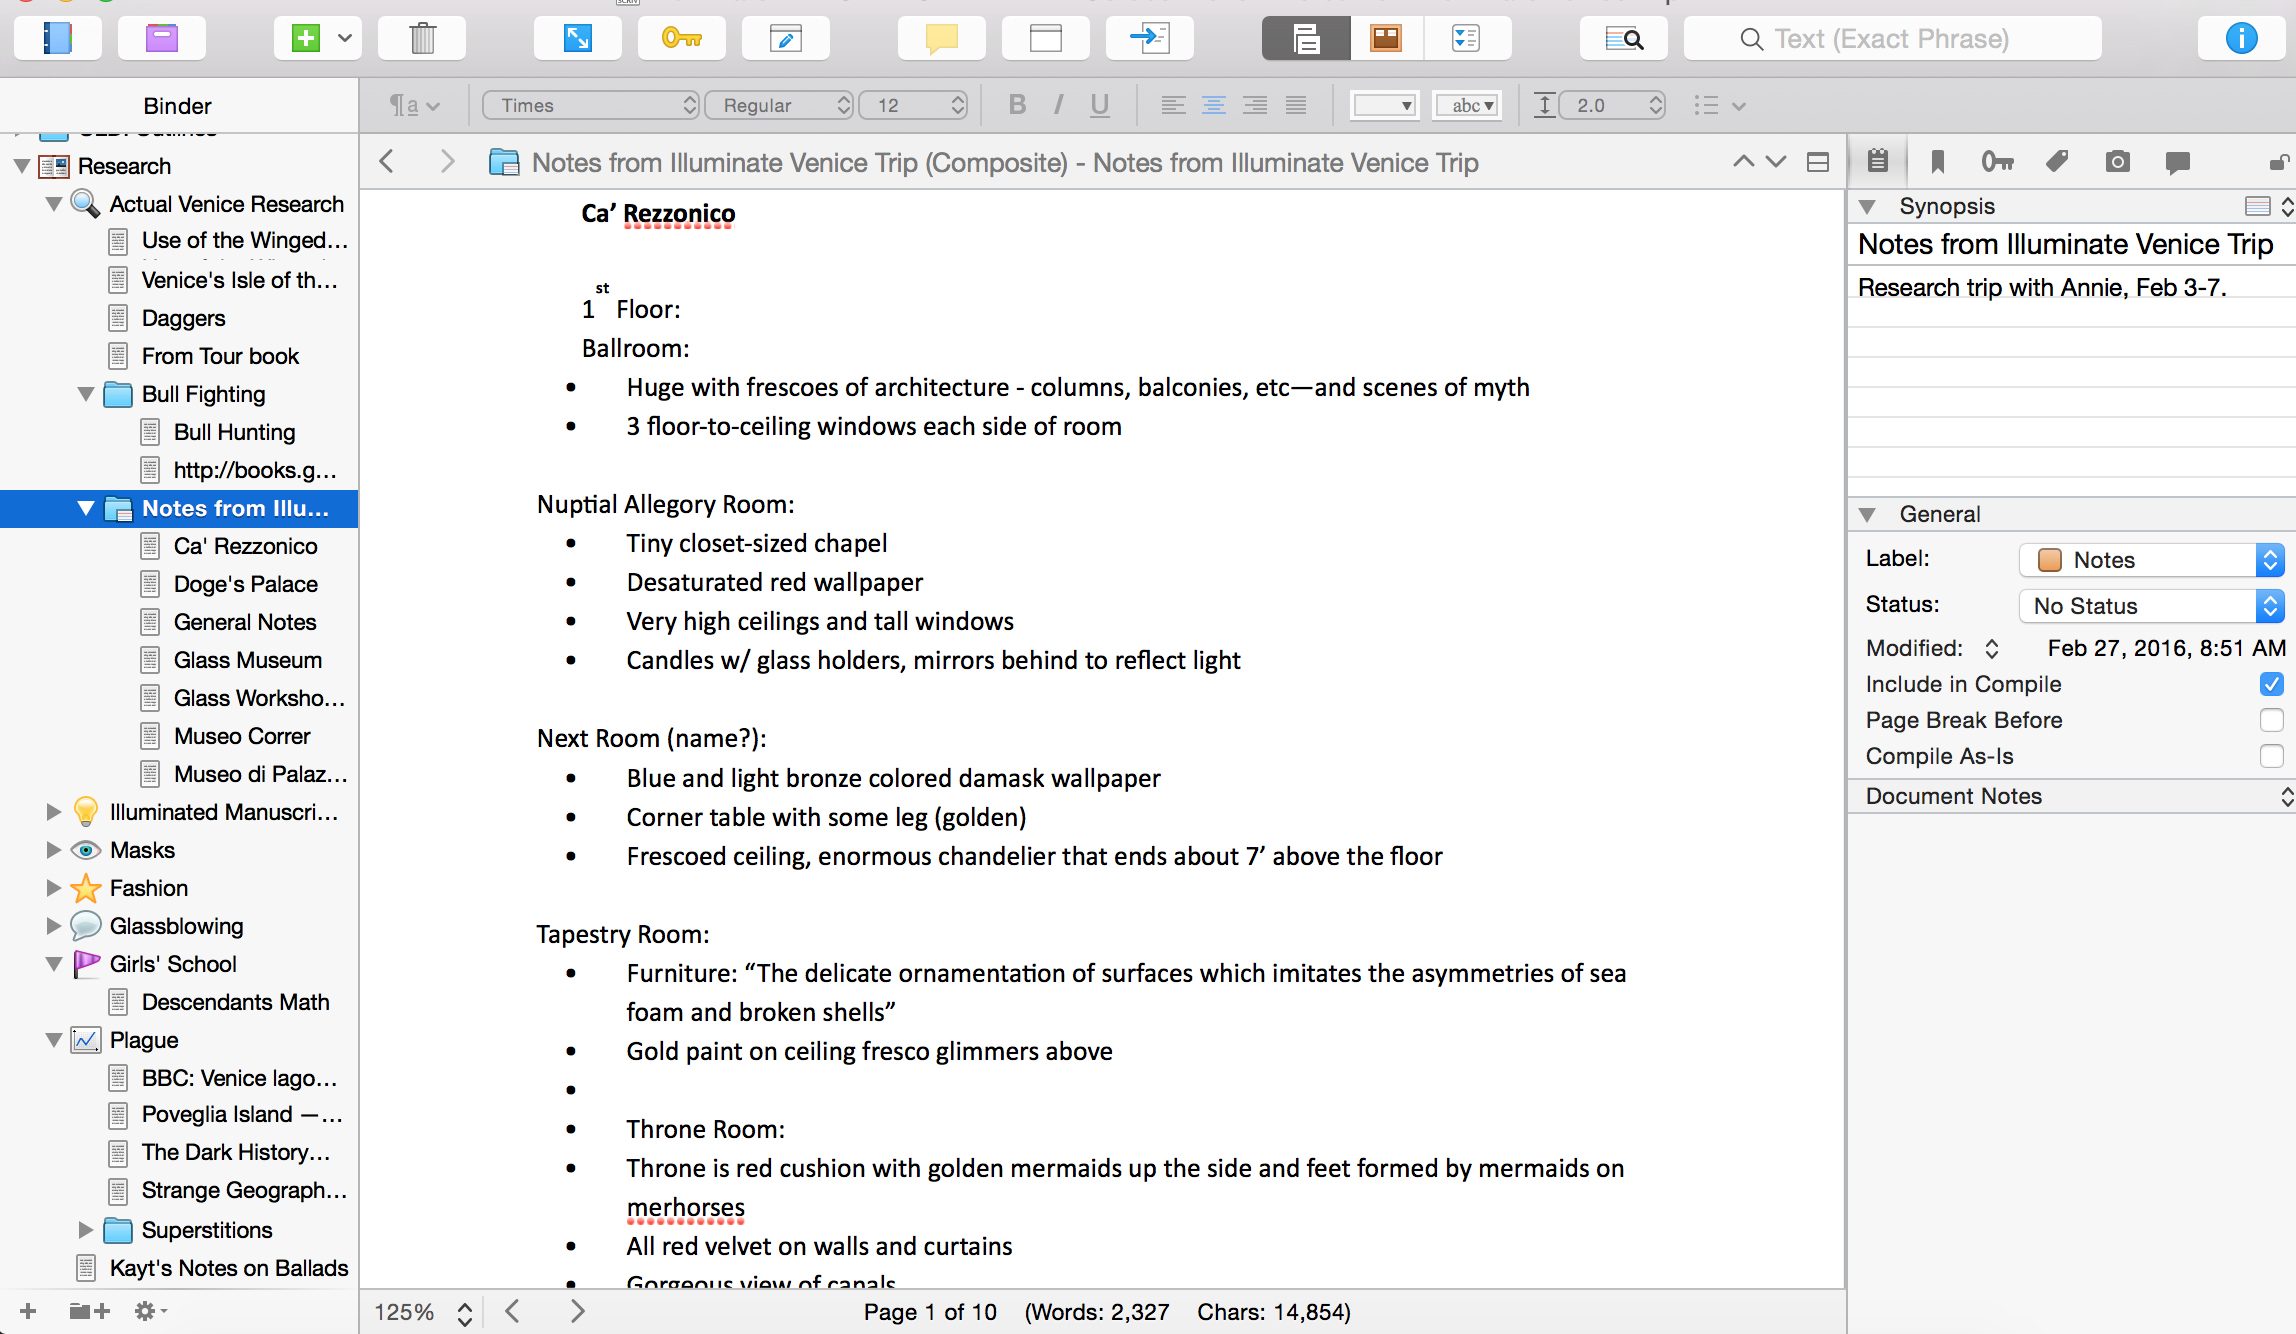
Readers of the blog know I’m a big, big fan of Scrivener. Here’s a look at my research archive for Illuminate:

Using subfolders, you can pretty easily organize all of the information. If you need more help, you can also use keywords, metadata, or labels to get everything color coded and beautiful.
This is by far my favorite option. Everything is there and accessible, right in the program where I’m also writing. It’s easy to click through and find what I need quickly, and if I want to reorganize or restructure the information it only takes me a few seconds.
How do you like to archive your research? Leave a comment below!


